B. Raytrace Shadow
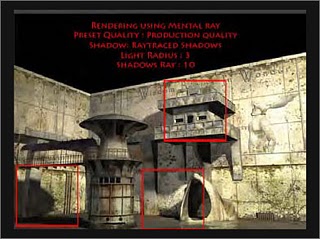
- Raytraced shadows provide an accurate shadow and are able to cast shadows through transparent objects, such as glass, but the render times are again much longer. Under the Raytrace Shadow Attributes, we can use the Light Radius to control the softness of the shadows’ edge. Higher Shadows Rays can decrease the noise of the soft shadow; Ray Depth Limit allows us to control the amount of the shadow casting through the transparent object.
- One important note about the Raytrace Shadow is that Mental Ray rendered raytraced shadows are much faster than those done with the Maya software renderer. So let’s try to render our image with the Mental Ray renderer. When we open the Render Settings window, let’s change our renderer to Mental Ray (Render using > Mental Ray). Let’s use Production Quality under the Preset Menu. With the Production Quality, in this menu, in the first section, we’re focusing on the sample quality – a Min 0 to Max 2 Sample Levels is enough to provide good quality without obvious noise in the render.
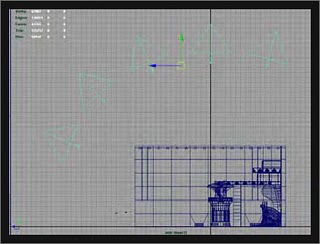
- The Raytracing section is where you’re able to control the accuracy of Reflection, Refraction and Shadows. The higher the number, the more accurate the result, but the render time will also take longer. If you open the attribute of any one of your materials, you’ll find the Raytrace Options. Under this section we are able to control the reflection information of each material separately; this is helpful to avoid the unnecessary render times. For example, we will change the Reflection Limit to 2 (by default it’s set to 1) for our Floor Material. Going back to the Render Settings window, let’s set a value of 2 for Reflection and Shadows under the Raytracing section (Fig.09 & Fig.10).
After all the basics have been done, let’s click again on Render Current Frame.

- Once our render is finished we’ll notice the shadow inside our scene appears much more accurate when compared to the Depth Map Shadows (Fig.11).
- We’ll use a so-called Dome light to simulate an outdoor environment lighting setup. With the Dome lighting method we create lots of lights to surround our scene in order to simulate a complex sky lighting condition, with an additional spotlight to act as the direction of our sun.
- First we’ll create a spotlight and set the Cone Angle to 70, the Penumbra Angle to 10, and the Intensity to 0.02. Turn on the Ray Trace Shadows. Once the spot light is created, from the side view, start to duplicate and re-position the duplicated spot lights to create a curve shape over the top of the scene (Fig.12).
- Let’s create a group for our spot light and set the pivot to the centre of the group (Modify > Centre Pivot). Keep duplicating the group of the spot light and re-positioning them until they become a sphere shape covering the entire scene.
- Once our Dome light is created, we’ll create another spot light and set the Intensity to 0.7, the Cone Angle to 80, and the Penumbra Angle to 15. This will be treated as the sun inside our scene, so once again let’s give it a warm colour. We now need to create another two fill lights and place them under the floor. Break up the link between these two fill lights with the floor (Fig.13).
- The last thing to set up in our scene is the simulation of the colour of the environment sky. Let’s open a sky image (text_V3_r2 / Sky _04), and in the Render View windows (File > Open Image), with our sky image open, let’s select each of our spot lights inside the scene and use the colour chooser to change the light colour randomly from the selections made on our sky image, until all the spot light colours have been chosen. Once that’s done, it’s time to render (Fig.14).
- We’ll keep our previous settings (Mental Ray) for the render (Fig.15).
Dome Light (Simulating Environment Lighting)
Rendering with Final Gather (Mental ray)
In this last part covering lighting methods, we’ll use Final Gather in Mental Ray to render our image. With a simple lighting set up, it’s usually hard to simulate light in the real world. In our world the light comes from different directions and is cast onto our object with different colours. Final Gather will produce the highest-quality lighting for our scene, but at the same it will take the longest to render.
- First of all we’ll create a sphere and scale it until it covers up our entire scene. We’ll cut off half of the sphere which is facing the bottom of our scene and then we need to create a spot light and use it to simulate the sun and create the highlight inside our scene (Colour: picked from the image, Intensity: 0.7, Clone Angle: 80, Penumbra Angle: 15, Dropoff: 25) (Fig.16).
- Inside the Hypershade we will create a Surface Shader and load the sky image we used before (text_V3_r2 / Sky _04) to the colour section. Apply this Surface Shader to the sphere we created and switch to the Hardware Texturing view option by pressing key number 6, followed by the image. Rotate the sphere so that it’s where that the sun should be coming from, and at the same time, place the spot light in the same direction as the sun, inside the image (Fig.17).
- Inside the Render Setting windows, we need to turn on Final Gather by checking the Secondary Effects > Final Gathering. Under the Final Gather section, we’ll set the Accuracy to 500 rays – a higher number of rays means a better quality of lighting as a result, but at the same time note that the render time will also increase; most of the time a maximum value of 1000 - 1500 will be good enough for a final render (Fig.18).
- The Scale section is for us to control the brightness of our environment: click on the colour bar, and a Colour Chooser will appear. Let’s set the V to 1.8. Final Gather gives us smoother lighting and richer colour in the render result (Fig.19).
Fig.19 |


